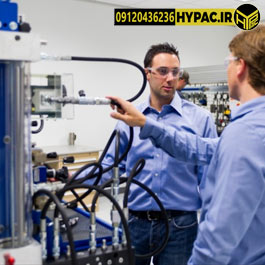
Installation and Commissioning of Hydraulic Systems ــــ ⏱ 4 min read
Installing and commissioning hydraulic systems requires precision, adherence to technical and safety standards, and a thorough understanding of system components. Below is a streamlined guide to the process:

Key Installation Steps
1. Preparation
- Review Design Schematics: Ensure technical drawings match project requirements.
- Gather Components: Pumps, valves, cylinders, pipes, fittings, filters, and tools (torque wrenches, welding equipment).
- Inspect Installation Space: Ensure easy access for maintenance.
2. Installing Core Components
- Reservoir:
- Install below the pump to prevent cavitation.
- Connect inlet/outlet filters and add level/temperature sensors.
- Hydraulic Pump:
- Align and couple to the drive motor.
- Install a relief valve to prevent overpressure.
- Control Valves:
- Mount directional, pressure relief, and flow control valves per schematics.
- Use anti-vibration mounts.
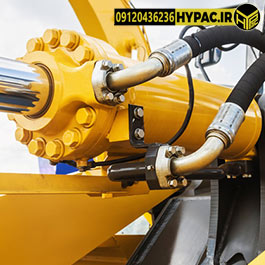
- Actuators (Cylinders/Motors):
- Install cylinders with pivot joints to absorb lateral forces.
- Align motors with mechanical loads.
3. Piping and Connections
- Pipes: Use high-pressure stainless steel or hydraulic tubing.
- Cutting/Bending: Minimize fittings to reduce leaks.
- Fittings:
- Use appropriate O-rings and seals.
- Tighten to manufacturer-specified torque.
- Label Lines: Mark high-pressure, return, and drain lines.
4. Electrical and Control Setup
- Connect Motors: Link pumps to motors with overload protection.
- Wire Sensors: Pressure gauges, level sensors, and limit switches.
- Control System: Program PLCs or manual controls for pressure, flow, and timing.
5. Fluid Charging
- Select Fluid: Choose oil based on viscosity (e.g., ISO VG 46).
- Filter Oil: Use 10-micron filters during filling.
- Bleed Air: Open air vents in cylinders/pumps to remove bubbles.
Commissioning
1. Initial Testing
- Dry Test: Check pump rotation and component freedom.
- Low-Pressure Test: Run at 20-30% rated pressure to detect leaks.
- Flow Check: Ensure no blockages in pipes/filters.
2. Final Adjustments
- Set Relief Valves: Gradually increase pressure to design levels.
- Calibrate Sensors: Match outputs (e.g., 200 bar = 4-20mA signal).
- Actuator Test: Verify cylinder speed/force in both directions.
3. Full-Load Test
- Apply Load: Test under normal and 10-15% overload conditions.
- Monitor Parameters: Record temperature, pressure, and noise.
- Cooling Check: Ensure radiators/fans manage heat.
Safety Tips
- Wear PPE (gloves, goggles, safety shoes).
- Use lockout-tagout during maintenance.
- Avoid skin contact with hydraulic oil.
- Install high-pressure warning signs.
Common Post-Installation Issues
| Issue | Cause | Solution |
|---|---|---|
| Oil Leaks | Loose fittings or bad seals | Tighten fittings/replace seals. |
| Overheating | Low oil or dirty radiator | Refill oil/clean radiator. |
| Pump Failure | Cavitation or wear | Check oil level/replace pump. |
| Vibration/Noise | Air ingress/misalignment | Bleed air/realign components. |
Post-Commissioning Maintenance
- Regular Inspections: Check leaks, oil levels, and filters every 50 hours.
- Fluid/Filter Replacement: Follow manufacturer guidelines (every 1,000–2,000 hours).
- Operator Training: Teach staff to recognize warning signs (e.g., pressure drops).
Specialized Tools
- Hydraulic pressure testers.
- Endoscopes for pipe inspections.
- Vibration analyzers for alignment checks.
By following these steps and standards, your hydraulic system will deliver stable, safe, and cost-effective performance. For project-specific guidance, share detailed requirements! 🛠️
Hydraulic Training Courses
Industrial Hydraulic Training CoursesOrganizing industrial hydraulic training courses requires meticulous planning, relevant scientific content, and adequate equipment—all of which Hypac provides. We offer the following types of industrial hydraulic training programs: Course Types Course Objectives Few machines or production lines operate without hydraulic systems. As skilled technical experts, we must be familiar with components like […]
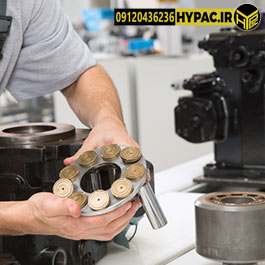
Repair and Overhaul of Industrial Hydraulic Systems
Repairing and rebuilding hydraulic systems requires technical expertise, experience, and proper tools. Hydraulic systems are used in industrial machinery, vehicles, construction equipment, and many other industries. Below are key steps and tips for hydraulic system repair and overhaul: Problem Diagnosis (Troubleshooting) Repair and Overhaul Steps 1. System Depressurization 2. Component Disassembly 3. Inspection and Cleaning […]
افزودن دیدگاه